
Shopify A/B Testing: 12 Tactical Steps to Boost Conversions (2026)
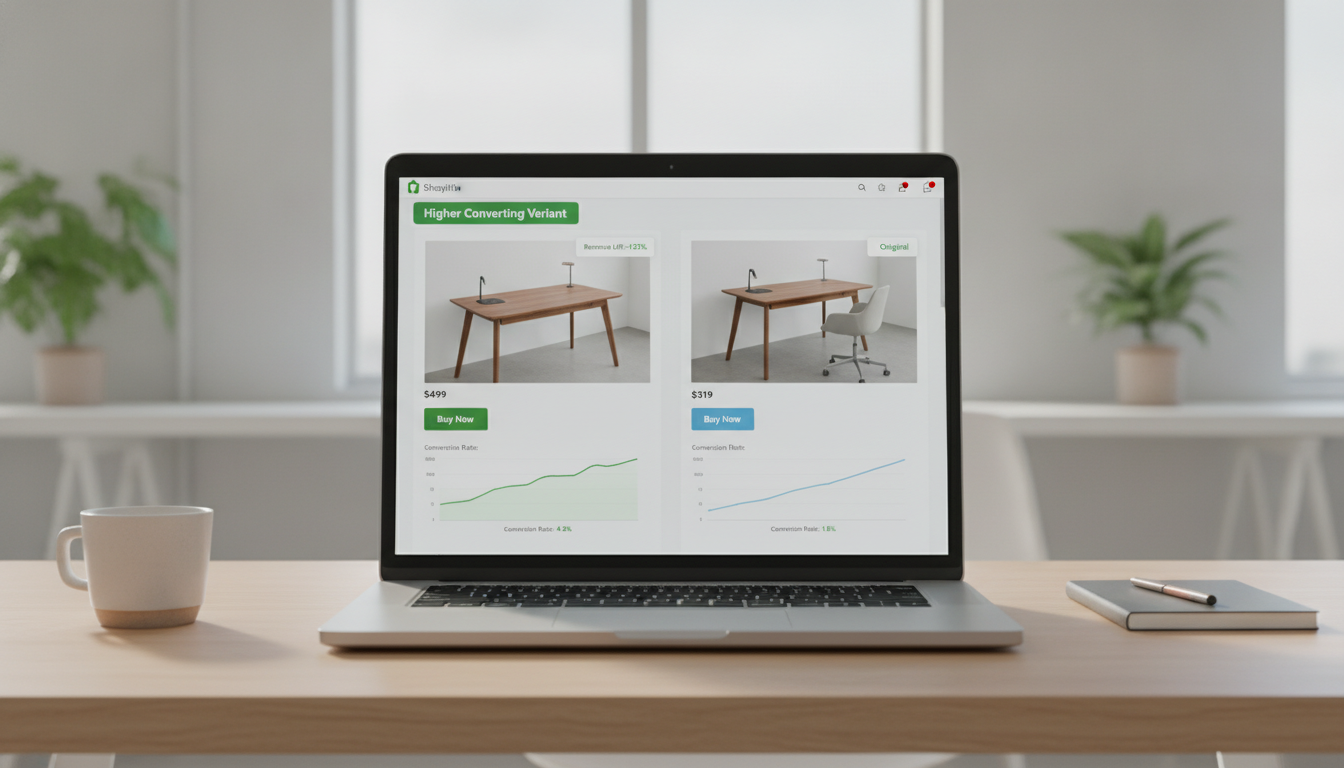
Most Shopify store owners redesign pages based on gut feel — and bleed revenue every single month because of it. According to Baymard Institute (2025), the average e-commerce checkout abandonment rate sits at 70.19%, meaning nearly three out of every four visitors who intend to buy never complete the purchase. If your Shopify store isn’t running structured A/B tests, you’re optimizing blind. This guide gives you a repeatable, data-driven framework to find exactly what’s killing your conversions — and fix it with evidence, not guesswork.
- A/B testing on Shopify requires the right tooling — native Shopify features alone aren’t enough for serious split testing.
- Statistical significance at 95% confidence is the minimum threshold before you declare a winner.
- The highest-ROI elements to test first: product page headlines, CTA button copy, hero images, and checkout flow steps.
- Most stores need 1,000–2,000 sessions per variant before results are reliable — rushing tests is the #1 mistake.
- Combining Hotjar session recordings with Google Analytics 4 event data gives you qualitative context that raw numbers miss.
Why A/B Testing Is Non-Negotiable for Shopify Growth in 2026
Paid traffic costs have risen sharply — Meta CPMs increased roughly 17% year-over-year through 2025 (WordStream). Every percentage point of conversion rate improvement you earn through A/B testing is pure margin, because you’re converting the traffic you’re already paying for.
A store converting at 2.5% instead of 1.8% on the same traffic volume generates 38% more revenue without touching ad spend. That’s the compounding logic behind a disciplined Shopify A/B testing program.
The stores outranking you on Shopify category pages and spending less on acquisition aren’t doing anything magical — they’re running more tests, killing losers faster, and doubling down on winners.
What Is A/B Testing on a Shopify Store? (The Tactical Definition)
A/B testing — also called split testing — means showing two distinct versions of a page element to separate, randomly divided segments of your traffic simultaneously, then measuring which version drives more of your target action (add-to-cart, checkout initiation, purchase).
On Shopify specifically, “A/B testing” covers three distinct layers:
- Front-end split tests: Two versions of a product page, collection layout, or hero banner served to different visitors.
- Checkout experiments: Testing upsell copy, trust badges, payment button order, or form field labels inside Shopify’s checkout (requires Shopify Plus for deep customization).
- Email + SMS flow tests: Testing subject lines, send times, and offer structures in Klaviyo to improve post-visit revenue recovery.
Each layer requires different tools and has different traffic volume requirements. Conflating them is what causes most teams to draw wrong conclusions from their data.
The 12-Step Shopify A/B Testing Framework
Step 1: Audit Your Analytics Before Writing a Single Hypothesis
Open Google Analytics 4 and navigate to Reports → Monetization → Checkout Journey. Identify the step with the largest percentage drop-off. That single screen tells you where to run your first test — you’re not guessing, you’re following the data.
Cross-reference that data in Hotjar by creating a Heatmap on the page with the highest drop-off. Look specifically at scroll depth and click maps — if users aren’t reaching your primary CTA, no button color test will save you.
Step 2: Form a Falsifiable Hypothesis
Every test needs a hypothesis written in this format: “If we [change X], then [metric Y] will increase by [estimated Z%], because [user behavior reason].”
Example: “If we change the product page CTA from ‘Add to Cart’ to ‘Get Yours Now’, then add-to-cart rate will increase by 8%, because more specific action-oriented copy creates urgency without implying friction.”
Without this structure, you’ll run tests that teach you nothing even when they win.
Step 3: Choose the Right A/B Testing Tool for Shopify
Shopify has no native A/B testing engine built in — you need a third-party solution. Here are the primary options in 2026:
| Tool | Best For | Shopify Compatibility | Starting Price (2026) | Statistical Engine |
|---|---|---|---|---|
| Convert Experiences | Mid-to-large stores, GA4 integration | All Shopify plans | $199/mo | Frequentist + Bayesian |
| VWO (Visual Website Optimizer) | Full CRO programs, heatmaps + testing | All Shopify plans | $314/mo | Frequentist |
| Intelligems | Shopify price testing + content tests | Shopify & Shopify Plus | $149/mo | Bayesian |
| Shoplift | Theme-level split testing, easy setup | All Shopify plans | $99/mo | Bayesian |
| Google Optimize replacement (via GA4 + GTM) | Budget-conscious stores with dev resources | All Shopify plans | Free (dev time required) | Frequentist |
For stores doing under $500K/year, Shoplift or Intelligems offer the fastest time-to-first-test. For stores above $1M/year running continuous testing programs, Convert Experiences or VWO provide the reporting depth you need.
Step 4: Calculate the Traffic You Need Before Starting
This is where most Shopify merchants make a fatal mistake — they end a test after three days because one variant is “winning.” You need a minimum of 1,000 sessions per variant (2,000 total for an A/B test) at your current conversion rate before results carry statistical weight.
Use the free Evan Miller Sample Size Calculator: input your baseline conversion rate, minimum detectable effect (typically 10-20%), and desired confidence level (95%). If your store gets 200 sessions/day, a test needs to run for at least 10–14 days to be reliable — and never less than 7 days regardless of traffic, to account for weekly behavioral patterns.
Step 5: Isolate One Variable Per Test
Testing a new headline AND a new hero image AND a new CTA button simultaneously is a multivariate test — not an A/B test. Unless you have 50,000+ monthly sessions, multivariate tests will take so long to reach significance that your results are meaningless by the time you have them.
Change one element. Measure one outcome. Move fast on individual tests rather than slow on complex ones.
Step 6: Prioritize Your Test Backlog Using the PIE Framework
Score every potential test idea across three dimensions on a 1–10 scale:
- Potential: How much could this improve the metric if it wins?
- Importance: How much traffic and revenue flows through this page/element?
- Ease: How quickly can your team implement the variation?
Average the three scores. Run the highest-PIE tests first. This prevents teams from testing trivial button colors on low-traffic pages instead of high-impact product page changes.
Step 7: Set Up GA4 Custom Events to Track Micro-Conversions
In Google Analytics 4, go to Admin → Data Streams → [Your Stream] → Enhanced Measurement and ensure all scroll, click, and form interaction events are enabled. Then add custom events via Google Tag Manager for specific micro-conversions: image gallery interactions, size guide opens, review section engagements.
Macro conversions (purchases) take time to accumulate. Micro-conversions (add-to-cart, checkout initiation) give you signal faster and often predict final purchase rate accurately enough to act on.
Step 8: Run Your Highest-Impact Test Categories First
Based on industry CRO data from Baymard, CXL Institute, and Shopify’s own merchant benchmarks, these elements consistently produce the largest lift when tested:
- Product page headline / value proposition copy — average lift potential: 15–30%
- Primary CTA button copy and color contrast — average lift potential: 10–20%
- Hero image (lifestyle vs. product-only vs. in-use) — average lift potential: 12–25%
- Social proof placement (reviews above vs. below fold) — average lift potential: 8–18%
- Shipping threshold messaging — average lift potential: 10–15%
- Checkout trust badges — average lift potential: 5–12%
Notice that none of these are font choices or background colors. Test elements that change the fundamental message or perceived risk of buying.
Step 9: Segment Your Test Results — Don’t Read Aggregate Data Only
A variant that performs 12% better overall might be performing 35% better on mobile and 8% worse on desktop. Shopify stores average 72% of traffic from mobile devices in 2025 (Shopify Commerce Trends Report), so mobile-specific test results often matter more than aggregate numbers.
In Convert Experiences or VWO, always segment results by:
- Device type (mobile / tablet / desktop)
- Traffic source (paid / organic / email / direct)
- New vs. returning visitors
- Geographic location (if you sell internationally)
Step 10: Integrate Qualitative Data to Explain Why Tests Win or Lose
When a test wins, you need to know why — otherwise you can’t apply the learning to future tests. Install Hotjar on both variants and watch session recordings filtered to converting sessions on the winner and non-converting sessions on the loser.
Patterns you’re looking for: Do winning-variant visitors scroll differently? Do they interact with elements the losing-variant visitors skip? Hotjar’s Rage Click feature also flags UX friction points that quantitative data completely misses.
Step 11: Document Every Test in a Structured Learning Log
Build a simple spreadsheet (or Notion database) with these columns for every test you run:
- Test ID and name
- Page / element tested
- Hypothesis
- Start and end date
- Traffic per variant
- Primary metric result (with confidence level)
- Winner / loser / inconclusive
- Key learning (the “why”)
- Next test suggested by this result
After 20 tests, this log becomes a competitive intelligence asset. You’ll see patterns in what your specific audience responds to that no agency playbook will ever give you.
Step 12: Implement Winners Permanently and Protect Them
In Shopify, go to Online Store → Themes → [Active Theme] → Customize to implement winning changes directly into your live theme. Once implemented, document the change in your Shopify theme version notes so future developers don’t accidentally revert it during updates.
Use Shopify’s Theme duplication feature (Online Store → Themes → Actions → Duplicate) before implementing any winner, so you have a rollback point if something breaks post-implementation.
What Is A/B Testing on Shopify Stores — and What Makes It Different from Other Platforms?
A/B testing on Shopify stores is the practice of systematically testing two or more versions of your store’s pages, elements, or flows against each other using real visitor traffic — then using statistical analysis to identify which version produces better business outcomes. The key business outcomes on Shopify are: conversion rate (purchases / sessions), average order value (AOV), and revenue per visitor (RPV).
What makes Shopify A/B testing different from testing on a custom-built site is the platform’s architecture. Shopify’s checkout is largely controlled by Shopify itself, which means your testing freedom varies significantly by plan:
- Shopify Basic / Shopify / Advanced: You can test everything up to the checkout entry point freely. Inside checkout, customization is limited to branding (logo, colors, font) via Settings → Checkout → Customize.
- Shopify Plus: The Checkout Extensibility framework (available since 2024) lets you add and test custom UI components, upsells, and trust elements directly in the checkout flow — a significant advantage for stores serious about AOV and checkout conversion optimization.
Another Shopify-specific challenge is theme architecture. Shopify themes are built in Liquid (Shopify’s templating language), meaning some A/B testing tools that inject JavaScript variants may conflict with Liquid-rendered sections. Tools like Shoplift and Intelligems are purpose-built for Shopify’s Liquid architecture and avoid these conflicts — which is why they’re preferable over general-purpose tools like old-school Optimizely for most Shopify stores.
A critical distinction many merchants miss: A/B testing is not the same as Shopify’s Markets feature or using different themes for different regions. True A/B testing requires simultaneous exposure, random assignment, and statistical measurement — all happening at the same time on the same URL. Sequential testing (running version A for two weeks, then version B for two weeks) is almost always invalid because seasonality, promotions, and traffic mix changes contaminate the results.
How to Fix Common Shopify A/B Testing Mistakes That Corrupt Your Data
Running broken A/B tests is worse than running no tests at all — you make changes based on false signals and hurt your conversion rate with confidence. Here are the most common testing mistakes on Shopify stores and exactly how to fix each one.
Fix #1: Stop Ending Tests Too Early
The most common mistake. A variant jumps to a 20% lift on day two, you end the test and ship it — then watch conversion rate drop back to baseline. This is called the “peeking problem.” Fix it by setting your test end date using a sample size calculator before you start, and committing to that date regardless of what early data shows. Most reliable testing platforms like VWO now include “peeking prevention” warnings — enable them.
Fix #2: Fix Traffic Leakage Between Variants
If the same user sees both variant A and variant B during your test (because they cleared cookies, switched devices, or used incognito mode), your data is contaminated. Fix this in Convert Experiences or Shoplift by enabling sticky bucketing — a method that assigns users to variants based on persistent identifiers (like Shopify customer ID for logged-in users) rather than cookies alone.
Fix #3: Separate Your Test Traffic from Bot Traffic
PageSpeed Insights crawlers, uptime monitoring bots, and SEO crawlers all register as sessions in your test data. In GA4, go to Admin → Data Streams → More Tagging Settings → Define Internal Traffic and exclude your office IP. In your testing tool, filter out known bot traffic by excluding sessions under 3 seconds in duration from your conversion analysis.
Fix #4: Don’t Run Tests During Promotional Periods
Running a CTA test during a Black Friday sale inflates conversion rates across both variants by 40–80% above normal — and the relative difference between variants often disappears because intent is so high that copy nuances don’t matter. Pause all tests at least 3 days before and after any major promotion, then resume.
Fix #5: Fix Attribution Conflicts with Klaviyo
If you’re running email flows through Klaviyo simultaneously with an A/B test, email-referred visitors arrive with higher purchase intent than organic visitors — which will skew results if your email list happens to be assigned to one variant more than the other by random chance. Segment your test results by traffic source in your testing tool and analyze email vs. non-email traffic separately.
Why Shopify A/B Testing Programs Fail to Produce Results
Most Shopify merchants who “tried A/B testing” and gave up didn’t fail because testing doesn’t work — they failed because of predictable, fixable structural problems. Understanding why testing programs collapse is the first step to building one that doesn’t.
Reason #1: Testing cosmetic elements instead of conversion drivers. Button color tests, font changes, and icon swaps almost never reach statistical significance on stores with under 100,000 monthly sessions. The effect size is too small. Meanwhile, testing your value proposition copy, your primary product image, or your free shipping threshold can produce 15–25% lifts even on modest traffic volumes because these elements address the core question in every buyer’s mind: “Why should I buy this, from you, right now?”
Reason #2: No clear ownership. When “everyone” is responsible for the A/B testing program, no one is. Assign one person as the test owner — they write the hypothesis, set up the test, monitor data quality, and write the post-test analysis. Even if that person is the founder at a small store, the program needs a single accountable owner.
Reason #3: Insufficient traffic volume. A store getting 3,000 sessions per month cannot run statistically valid A/B tests on low-conversion events like purchases. The math simply doesn’t work. For low-traffic Shopify stores, focus testing efforts on micro-conversions (add-to-cart rate, email opt-in rate) that accumulate faster — or invest in growing traffic before investing heavily in testing infrastructure.
Reason #4: Testing without a hypothesis. Random testing — “let’s try a different image and see what happens” — rarely produces learnable outcomes even when a variant wins. Without a hypothesis, you don’t know why something worked, so you can’t build on the learning. Over time, a hypothesis-driven testing program compounds knowledge; a random one just generates noise.
Reason #5: Ignoring the post-test phase. Most teams spend 90% of their effort setting up tests and only 10% analyzing them. The post-test analysis — where you segment results, form new hypotheses, and update your customer model — is where the real value lives. Build 2–3 hours of structured analysis time into every test cycle.
How to Prevent Shopify A/B Testing Errors from Wasting Your Time and Budget
Prevention is faster than fixing broken tests mid-run. Build these guardrails into your testing process from day one and you’ll save weeks of wasted effort over a 12-month testing program.
Pre-Test Quality Checklist
Before activating any test, run through this checklist to catch 90% of potential problems before they corrupt your data:
- QA both variants on mobile and desktop using Chrome DevTools device simulation and a real iOS/Android device — Shopify themes render differently across breakpoints.
- Verify GA4 event tracking is firing on both variants using GA4 DebugView (GA4 → Admin → DebugView) before sending live traffic.
- Confirm page speed is equal across variants using PageSpeed Insights. A variant that loads 1.5 seconds slower will lose — but not because of your change. Use PageSpeed Insights on both variant URLs before launch.
- Set your minimum runtime and sample size in writing before starting. Use the Evan Miller calculator, document the numbers, and don’t deviate.
- Disable any overlapping personalization rules in Rebuy or similar tools during the test period. If Rebuy is showing different product recommendations to returning visitors and those visitors are unevenly distributed between your variants, the test is compromised.
Ongoing Test Monitoring Rules
Check your tests once per day maximum — not every hour. Excessive checking increases the psychological temptation to call winners early. Set a calendar reminder for your pre-committed end date and only do a full analysis then, unless you detect a major technical failure (zero conversions on one variant is a sign the tracking broke, not that the variant lost).
Post-Test Documentation Standards
After every test, spend 30 minutes writing a structured post-test analysis before implementing any changes. The analysis should answer: What did we test? What did we find? Why did it happen (qualitative theory)? What do we test next? Store these in a shared Notion workspace or Google Doc — this institutional knowledge is what separates stores with mature CRO programs from those perpetually starting over.
One final prevention strategy that most guides skip: Run an A/A test (same page shown to both variants) for 7 days before your first real A/B test on a new testing platform. If your A/A test shows a statistically significant difference between variants, your testing tool has a configuration problem. Fix the tool before running any real tests — otherwise every result you ever collect on that platform is suspect.
Shopify A/B Testing Benchmarks: What “Good” Actually Looks Like
One of the most disorienting parts of running A/B tests is not knowing whether your results are normal. Here are realistic benchmarks based on published data from CXL Institute, Baymard, and Shopify’s Commerce Trends reports:
| Metric | Low Performing | Average Shopify Store | Top 10% Shopify Store |
|---|---|---|---|
| Overall Conversion Rate | < 1.2% | 1.8% – 2.5% | 3.5% – 5.5% |
| Add-to-Cart Rate | < 5% | 7% – 12% | 15% – 22% |
| Checkout Initiation Rate | < 30% | 40% – 55% | 60% – 72% |
| Checkout Completion Rate | < 45% | 55% – 65% | 70% – 82% |
| Mobile Conversion Rate | < 0.9% | 1.4% – 2.0% | 2.8% – 4.2% |
| Average Test Win Rate | < 15% | 25% – 35% | 40% – 55% |
| Avg. Lift per Winning Test | < 5% | 8% – 15% | 18% – 30% |
Note that even elite CRO programs only see winning tests 40–55% of the time. If every test you run “wins,” you’re almost certainly ending tests too early or using insufficient traffic thresholds. Inconclusive results are not failures — they’re data points that tell you an element doesn’t significantly impact conversion, which is itself a useful finding.
Putting It All Together: Your 90-Day Shopify A/B Testing Roadmap
A structured 90-day testing roadmap prevents the most common trap: testing everything randomly and learning nothing systematically. Here’s how to structure your first quarter:
- Days 1–14 (Foundation): Audit GA4 checkout funnel data, install Hotjar, run heatmaps on your top 3 traffic pages, and document your top 10 test hypotheses ranked by PIE score. Choose and configure your testing tool. Run an A/A test to confirm tool accuracy.
- Days 15–45 (First Tests): Run 2–3 product page tests focused on your highest PIE-scored hypotheses. Prioritize CTA copy, hero image, and value proposition. Analyze results with mobile/desktop segmentation in GA4.
- Days 46–75 (Iterate): Take learnings from first tests, form second-generation hypotheses (e.g., if direct benefit CTA copy won, test different benefit framings). Expand testing to collection pages and navigation if product page results are strong.
- Days 76–90 (Review + Scale): Compile your test log, calculate total conversion rate movement, identify your highest-value learning, and plan Q2 tests. If you’re on Shopify Plus, begin planning checkout extensibility tests for Q2.
After 90 days of disciplined testing, most stores in the $200K–$2M range see a measurable 0.3%–0.8% absolute improvement in overall conversion rate. On a store doing $1M/year at 2% conversion, a 0.5% lift to 2.5% conversion translates to $250,000 in additional annual revenue on identical traffic — with zero additional ad spend. That’s the compounding logic that makes a rigorous Shopify A/B testing program one of the highest-ROI investments you can make in your store.