
Shopify Site to App Conversion: 12 Steps to Launch Your Mobile App (2026)
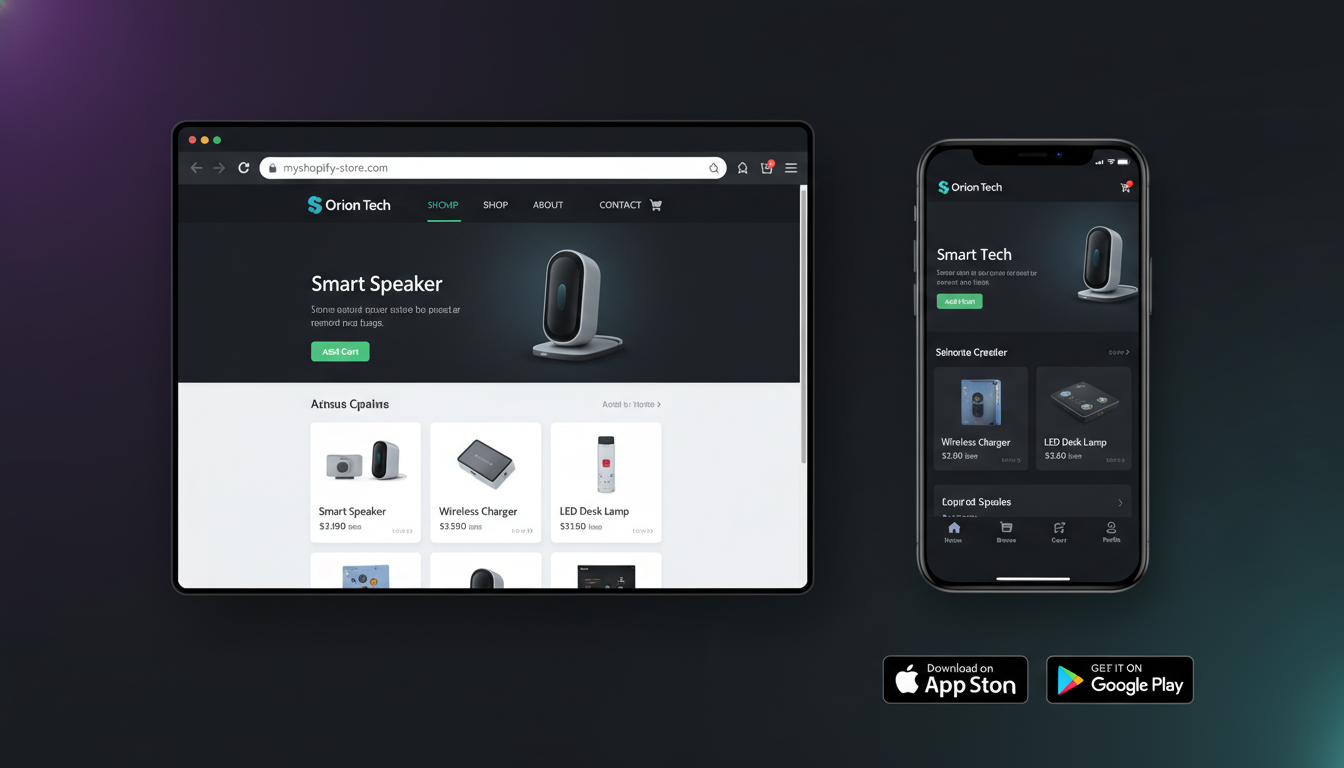
Your Shopify store is already generating revenue on mobile — but you’re leaving a measurable chunk of it on the table by relying solely on a mobile browser. Mobile apps convert at 3× the rate of mobile web (Criteo, 2025), and for stores doing $500K+ per year, that gap translates directly into tens of thousands of dollars in missed revenue. The stores that dominate mobile commerce in 2026 aren’t just responsive — they’re native.
This guide gives you the exact playbook to convert your Shopify website into a fully functional iOS and Android app — from choosing the right build approach to App Store submission, push notification setup, and measuring ROI post-launch.
- The three build approaches for Shopify-to-app conversion and which one fits your revenue stage
- A step-by-step walkthrough of the full conversion process — from API setup to App Store submission
- Benchmark data on mobile app conversion rates vs. mobile web for Shopify stores
- Specific tools (MageNative, Tapcart, Shopney, Vajro) compared side-by-side
- How to set up push notifications, deep links, and GA4 tracking inside your new app
Why Converting Your Shopify Store to a Mobile App Still Matters in 2026
The “just make your site mobile-friendly” argument was settled years ago. 72% of all e-commerce sales now happen on mobile devices (Statista, 2025), yet mobile web sessions still convert at roughly 1.8% vs. 5.3% for native apps (Criteo, 2025). That’s not a UX problem you can fix with a better theme — it’s a structural gap between the browser experience and a native one.
Native apps give you four specific advantages that a Shopify mobile theme never will:
- Push notifications with open rates of 20–30%, versus email’s average 2–5% click-through rate (OneSignal, 2025)
- Offline browsing — customers can view products and wishlists without a connection
- Biometric checkout
- Device-native gestures — swipe-to-save, haptic feedback, and camera-powered AR try-ons
— Face ID and Touch ID authentication that slashes checkout friction
For Shopify merchants specifically, the app conversion also feeds directly into customer lifetime value. App users make purchases 3.5× more frequently than mobile web users from the same brand (Shopify Plus, 2024 Partner Report). If your repeat purchase rate is your growth engine, this is where you accelerate it.
The 3 Build Approaches: Which One Is Right for Your Store?
Before you write a single line of code or sign up for any platform, you need to decide your build strategy. There are three viable paths, and the wrong choice at this stage will cost you either time, money, or flexibility down the road.
1. No-Code App Builder Platforms
Tools like Tapcart, Shopney, Vajro, and MageNative connect directly to your Shopify store via API and generate a native app from your existing catalog, collections, and theme branding. Setup takes 1–3 weeks. Pricing typically runs $99–$999/month depending on features like push notifications, custom pages, and analytics depth.
This is the right path if you’re doing under $2M/year in revenue and want to test the mobile app channel before committing to a custom build. The trade-off is limited design control and shared infrastructure.
2. Custom Native Development
A development agency builds a bespoke iOS and Android app using Shopify’s Storefront API and Customer API. You get full design control, custom features (AR product views, loyalty program integrations, subscription management), and a codebase you own. Budget: $40,000–$150,000+ for initial build, plus ongoing maintenance.
This path makes sense for stores above $3M/year where the conversion rate delta justifies the investment, or where your product experience is complex enough that no-code tools can’t replicate it.
3. Progressive Web App (PWA)
A PWA sits between the two — it’s a web app that behaves like a native app, installable from the browser with offline support and push notifications. You can build a Shopify PWA using headless commerce frameworks like Hydrogen + Oxygen (Shopify’s own stack). PWAs don’t live in the App Store, which removes one distribution channel, but they’re faster to ship and cheaper to maintain than full native builds.
PWAs are best for stores that already have strong SEO and want to preserve it while adding app-like features. For push notification-driven retention, native still wins.
Step-by-Step: How to Convert Your Shopify Store Into a Mobile App
The following steps apply whether you’re using a no-code builder or working with a development partner. The sequencing matters — skip the analytics and testing steps and you’ll have no baseline to measure your ROI against.
Step 1: Audit Your Shopify Store Before Migration
Run your store through PageSpeed Insights and Hotjar to identify your current mobile conversion funnel drop-off points. Document your top 10 product pages, most-used filters, and checkout completion rates in Google Analytics 4 (GA4). These become your benchmarks post-launch.
In GA4, go to Reports → Life Cycle → Monetization → Purchase Journey to see exactly where mobile web users abandon. You’ll want to confirm your app improves each stage.
Step 2: Choose and Connect Your App Platform or Development Stack
If using a no-code builder, install the relevant app from the Shopify App Store (Admin → Apps → App Store). All major builders — Tapcart, Shopney, Vajro — connect via OAuth to your store’s Storefront API automatically. Grant the required permissions during installation: read_products, read_orders, read_customers.
For a custom build, your developer will need a Private App credential or a Custom App configured in Shopify Admin → Settings → Apps and Sales Channels → Develop Apps. Enable the Storefront API with the appropriate scopes.
Step 3: Configure Your App’s Visual Identity
Your app should feel like an extension of your brand, not a reskinned product catalog. Upload your brand assets: app icon (1024×1024px for iOS, 512×512px for Android), splash screen, and primary/secondary color hex codes. In most no-code builders, this lives under the “Design” or “Branding” tab in the builder dashboard.
Pay specific attention to your bottom navigation bar — the 4–5 tabs that define your app’s information architecture. Most converting apps use: Home, Shop/Collections, Search, Wishlist, Account. Resist the urge to add more — each extra tab reduces focus.
Step 4: Sync Products, Collections, and Metafields
Verify that all your products, variants, and collection structures are syncing correctly into the app. Check that Shopify metafields powering custom product data (size guides, materials, care instructions) are being passed through the API to your app’s product detail pages.
Go to Shopify Admin → Settings → Custom Data → Metafields to confirm which metafields are active and mapped. If your no-code builder doesn’t support custom metafield display natively, this is a strong signal to consider a custom build or a hybrid approach using a tool like Rebuy for dynamic product recommendations inside the app.
Step 5: Set Up Push Notifications
This is the single highest-ROI feature of a native app. Connect a push notification service — Klaviyo now supports mobile push natively as of 2024, meaning you can manage email, SMS, and push from one platform. Alternatively, tools like OneSignal or the built-in push tools in Tapcart/Shopney work well at lower volumes.
Build at minimum four automated push flows at launch:
- Welcome push — triggered on first app open, 15 minutes after install
- Abandoned cart push — triggered 1 hour after cart abandonment (complement your Klaviyo email flow)
- Back-in-stock alert — triggered when a wishlisted product restocks
- Win-back push — triggered after 30 days of app inactivity
Step 6: Integrate Your Existing Tech Stack
Your app needs to inherit the logic you’ve already built in your Shopify ecosystem. Key integrations to configure before launch:
- Loyalty programs — LoyaltyLion or Smile.io via API or native SDK
- Product reviews — Okendo or Judge.me must display within product pages in-app
- Subscriptions — Recharge or Seal Subscriptions for stores with recurring revenue
- Search — Searchanise or Boost Commerce for filtered, intelligent in-app search
- Analytics — GA4 via Firebase SDK for app-specific event tracking
Step 7: Configure Deep Links
Deep links let you route users from external channels — email, SMS, social ads — directly to specific pages inside your app. Without them, every link you send opens a browser instead of the app, destroying the UX continuity you’ve worked to build.
Set up Universal Links (iOS) and App Links (Android) by verifying your domain in each platform’s developer console. If you’re using Klaviyo for push and email, configure deep link URL schemes within Klaviyo’s mobile push settings so that a “View your cart” button in an email opens the in-app cart — not a Safari tab.
Step 8: QA Test on Real Devices
Do not rely solely on simulators. Test on at minimum: iPhone 14 (iOS 17), iPhone 16 Pro (iOS 18), a mid-range Android (Samsung Galaxy A-series), and a high-end Android (Pixel 8). Key QA checklist items:
- Checkout flow from product page to order confirmation — including Apple Pay and Google Pay
- Push notification rendering on lock screen and in-app banner
- Deep link resolution from email and SMS
- Product image loading speed on 4G (not just WiFi)
- Collection filtering and search accuracy
Step 9: Submit to the App Store and Google Play
Apple App Store review typically takes 1–3 business days as of 2026. Google Play is generally 24–48 hours. Both require:
- A developer account — Apple ($99/year), Google ($25 one-time)
- App privacy policy URL (link to your existing Shopify store privacy policy)
- Age rating declaration
- App screenshots for each device size (6.7″, 6.1″ for iOS; multiple Android sizes)
- A demo account with login credentials if your app requires authentication to browse
For no-code builders, the platform typically handles submission on your behalf under your developer account. Confirm this workflow in their onboarding documentation.
Step 10: Run a Soft Launch to Your Email List First
Before any paid promotion, email your existing customer list via Klaviyo with a simple “Download our new app — get 15% off your next order” offer. This does two things: it seeds your initial app store reviews (critical for ranking), and it gives you real-user data before you spend on acquisition.
Target 50–100 reviews in the first 30 days. Apple’s algorithm weights early review velocity heavily in search rankings within the App Store.
Step 11: Set Up App-Specific Tracking in GA4
In GA4, create a separate data stream for your app (Admin → Data Streams → Add Stream → iOS App / Android App). This keeps your app metrics cleanly separated from your web metrics, so you can accurately attribute revenue to each channel.
Track these custom events from day one: app_open, product_view, add_to_cart, begin_checkout, purchase, push_notification_open. Configure conversions in GA4 for purchase and begin_checkout to get funnel visibility.
Step 12: Optimize Based on 30/60/90-Day Data
At 30 days, review your app’s conversion rate vs. your mobile web baseline in GA4. Use Hotjar‘s session recordings (available for mobile web) alongside your app’s in-built analytics to identify where users drop out of the purchase funnel. Most no-code builders include heatmap-equivalent tap analytics — use them.
At 60 days, A/B test your push notification copy using Klaviyo’s split testing feature. At 90 days, evaluate whether your app’s ARPU (average revenue per user) is trending toward the 3.5× mobile web benchmark. If not, dig into your abandoned cart flow timing and your product page layout before making any major structural changes.
Shopify-to-App Platform Comparison: Benchmarks & Pricing (2026)
| Platform | Starting Price/Month | iOS + Android | Push Notifications | Custom Design Control | Best For |
|---|---|---|---|---|---|
| Tapcart | $200 | ✅ | ✅ Native | Medium | Fashion, lifestyle brands $500K–$5M |
| Shopney | $99 | ✅ | ✅ Native | Medium | Mid-market stores, budget-conscious |
| Vajro | $99 | ✅ | ✅ Native | Low–Medium | Quick launches, smaller catalogs |
| MageNative | $49 | ✅ | ✅ Via integration | Low | Entry-level, testing the channel |
| Custom Native (Agency) | $40,000+ (one-time) | ✅ | ✅ Full control | Full | Stores $3M+, complex product needs |
| Shopify Hydrogen PWA | Dev cost varies | ⚠️ No App Store | ⚠️ Limited on iOS | Full | SEO-focused, headless-ready teams |
How to Convert Shopify Website Into App?
Converting your Shopify website into a mobile app follows a defined process, and the fastest path in 2026 is using a no-code app builder that connects to Shopify’s Storefront API. Here’s the condensed version of the full process covered above:
- Choose your build approach — no-code builder (Tapcart, Shopney, Vajro), custom native development, or a Hydrogen PWA based on your revenue, complexity, and budget.
- Install and connect — go to Shopify Admin → Apps → App Store, find your chosen builder, install it, and authorize the API scopes it requests. Product, collection, and customer data sync automatically.
- Design your app — configure your brand assets (app icon, splash screen, colors, typography) and define your navigation structure in the builder’s dashboard.
- Set up push notifications — connect Klaviyo or OneSignal, build your four core automated flows (welcome, abandoned cart, back-in-stock, win-back).
- Integrate your existing stack — Okendo for reviews, Rebuy for recommendations, LoyaltyLion for points, Recharge for subscriptions.
- QA test on real devices — test the full checkout flow, push notifications, and deep links on both iOS and Android hardware before submission.
- Submit to App Stores — Apple App Store ($99/year developer account) and Google Play Store ($25 one-time). Most no-code builders handle submission under your account.
- Soft-launch to your email list — drive initial downloads and reviews before any paid acquisition.
- Track performance in GA4 — set up a separate app data stream and monitor conversion rate, ARPU, and push notification open rates from day one.
The full timeline from decision to live app using a no-code builder is 2–4 weeks for a straightforward Shopify store. Custom builds typically take 3–6 months depending on scope. The single most common mistake merchants make is over-building the first version — launch with core commerce functionality, then iterate based on real user data.
One critical technical note: Shopify’s Storefront API requires that your app handle cart tokens and customer access tokens securely. If you’re building custom, ensure your development team is using the customerAccessTokenCreate mutation for authentication rather than storing plain-text credentials anywhere in the app bundle. This is a common App Store rejection reason and a security risk regardless.
What Is the Conversion Rate for Shopify App?
Mobile app conversion rates for Shopify stores consistently outperform mobile web, but the exact numbers depend heavily on your product category, app quality, and how aggressively you use push notifications to bring users back.
Here are the current benchmark ranges for 2025–2026 based on data from Criteo, Shopify’s Partner Program, and published case studies from Tapcart and Shopney:
- Mobile web conversion rate (Shopify average): 1.5%–2.5%
- Mobile app conversion rate (no-code builder): 3.5%–5.5%
- Mobile app conversion rate (custom native): 5%–8%+
- Desktop web conversion rate (Shopify average): 2.5%–4%
The conversion rate advantage comes from several compounding factors. First, app users are self-selected high-intent customers — someone who downloads your brand’s app is already demonstrating stronger purchase intent than a casual browser. Second, the native checkout experience — particularly with Apple Pay and Google Pay enabled — eliminates the form-filling friction that kills mobile web conversions. Third, push notifications create a re-engagement loop that doesn’t exist on mobile web.
Tapcart’s 2024 merchant data showed that stores using push notifications had a 32% higher app conversion rate than stores that had the app but didn’t run active push campaigns. This is critical: the app alone doesn’t move the needle — the re-engagement strategy around it does.
For stores using Rebuy inside their app for personalized product recommendations, average order value (AOV) increases of 15–25% are commonly reported, which compounds the conversion rate improvement into significantly higher revenue per session.
If you’re evaluating whether an app is worth the investment, use this simple framework: take your current monthly mobile web revenue, multiply by your expected conversion rate lift (conservatively 1.5×), and subtract the platform cost. For a store doing $50K/month in mobile web revenue at a 2% conversion rate, moving to 3.5% represents roughly $37,500/month in additional revenue — against a $200–$1,000/month tool cost. The math is rarely close.
Who Is the Highest Earner on Shopify?
The highest-earning stores on Shopify are predominantly enterprise and direct-to-consumer brands that have scaled beyond the standard Shopify plan onto Shopify Plus — and many of them have mobile apps as a core channel.
The publicly known top earners on Shopify as of 2025–2026 include:
- Gymshark — the UK-based activewear brand was one of Shopify’s earliest breakout success stories, growing to over $500M in annual revenue before a partial acquisition by General Atlantic. Gymshark runs a dedicated native app alongside its Shopify Plus storefront.
- Allbirds — the sustainable footwear brand processes hundreds of millions in annual revenue through Shopify Plus, with a mobile-first commerce strategy.
- Kylie Cosmetics — Kylie Jenner’s beauty brand generated $630M in revenue in its early years on Shopify, famously demonstrating that a DTC brand can scale to near-unicorn status on a Shopify stack.
- Fashion Nova — reportedly one of the highest-grossing Shopify stores globally, generating over $400M annually with an aggressive social-to-mobile commerce funnel.
- SKIMS — Kim Kardashian’s shapewear brand runs on Shopify Plus and was valued at $4 billion in 2023, with mobile commerce as a primary revenue driver.
What these stores have in common beyond revenue is mobile-first architecture. Each of them has invested significantly in reducing mobile checkout friction — either through dedicated apps, accelerated mobile pages, or Shop Pay integrations. Shopify’s own data shows that the top 1% of Shopify merchants by revenue have a Shop Pay adoption rate of over 60%, compared to roughly 30% for the broader merchant base.
It’s also worth noting that Shopify itself — as a platform company — reported facilitating over $235 billion in GMV in 2024 (Shopify Annual Report, 2024), making it the second-largest e-commerce platform in the US behind Amazon. The highest individual earner distinction is difficult to pin publicly since Shopify doesn’t disclose individual merchant revenue, but Gymshark and Fashion Nova are consistently cited as the top DTC performers on the platform.
Will AI Replace Shopify Developers?
This is the question every Shopify agency, freelance developer, and merchant building a custom app is asking in 2026 — and the honest answer is more nuanced than either the “AI will take all the jobs” or “developers are irreplaceable” camps want to admit.
Here’s what’s actually happening: AI is replacing the low-complexity tasks that junior Shopify developers were paid to do, while simultaneously creating demand for higher-order development work that AI cannot yet execute reliably. The net effect is a reshaping of the role, not an elimination of it.
Specifically, AI tools in 2026 can competently handle:
- Generating boilerplate Liquid template code for standard Shopify sections
- Writing Shopify CLI scaffolding and basic theme component logic
- Producing first drafts of Storefront API GraphQL queries
- Debugging common Liquid rendering errors with context-aware suggestions
- Converting design mockups into functional HTML/CSS sections via tools like Cursor AI and GitHub Copilot
What AI cannot do reliably in the context of Shopify development — particularly app development — is architect a scalable system, make judgment calls on UX trade-offs, or debug complex multi-system integration failures involving Shopify’s API rate limits, third-party webhooks, and custom app authentication flows. These are the exact problems that arise when you’re building a custom native app on top of Shopify’s infrastructure.
The practical implication for merchants is this: the cost of Shopify development is decreasing because AI makes competent developers faster, which means quotes for app builds that would have been $80,000 in 2023 might now come in at $45,000–$60,000. That’s good for merchants. But the value of a senior Shopify developer who can architect a headless app using Hydrogen, integrate it with a subscription engine and a loyalty program, and ensure it passes App Store review on the first submission — that value hasn’t decreased.
If you’re a merchant evaluating whether to use AI tools to self-build your Shopify app, be realistic about the scope. AI-assisted development works well for modifications to no-code builder outputs or simple Liquid customizations. It does not yet produce production-ready, App Store-compliant native iOS/Android apps without substantial human developer oversight. The 2026 sweet spot is AI-augmented human development, not AI-only.
Measuring Success: The KPIs That Actually Matter Post-Launch
Once your app is live, the temptation is to watch download numbers. Don’t. Downloads are a vanity metric. The numbers that determine whether your app investment is paying off are:
- App conversion rate — target 3.5%+ within 90 days; benchmark against your mobile web CVR in GA4
- Push notification opt-in rate — aim for 50%+ of users accepting push; below 30% means your opt-in prompt timing or copy needs work
- Push notification-attributed revenue — track in Klaviyo’s revenue dashboard; this should represent 15–25% of total app revenue by month 3
- 30-day retention rate — what percentage of users who downloaded the app are still opening it 30 days later; industry benchmark is 25–35% for shopping apps (Adjust, 2025)
- ARPU (average revenue per user) — divide total app revenue by total app users monthly; should be trending up as your push and personalization flows mature
Set up a GA4 Exploration report (GA4 Admin → Explore → Funnel Exploration) using your app data stream to visualize the product view → add to cart → checkout → purchase funnel weekly. This single report will tell you more about where to optimize than any other single data source.
The Real Competitive Advantage of Going App-Native on Shopify
Converting your Shopify store into a native mobile app isn’t a vanity project — it’s a structural revenue decision. The conversion rate gap between mobile web and native app is real, durable, and growing as consumer expectations for mobile shopping continue to rise. Stores that own a dedicated app also own a direct communication channel with their customers that no algorithm can throttle and no iOS update can block — provided you build your push notification strategy correctly from day one.
The 12-step process in this guide is designed to get you from zero to live app in the shortest defensible timeline without skipping the infrastructure that makes apps actually convert: push notification flows, deep link integration, GA4 tracking, and a disciplined soft-launch strategy. Whether you choose Tapcart at $200/month or invest $80K in a custom native build, the economics of app commerce in 2026 make the decision straightforward for any Shopify store generating meaningful mobile traffic. The question isn’t whether to build — it’s how fast you can launch and how rigorously you’ll optimize once you’re live.